
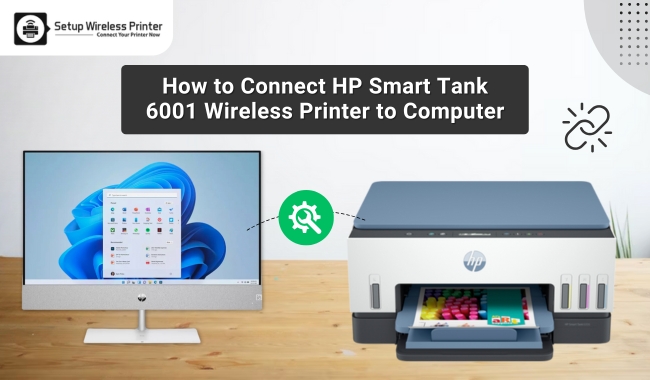
How to Connect HP Smart Tank 6001 Wireless Printer to Computer
March 13, 2025

HP Smart Tank printers are famous worldwide for their interesting features and capabilities. Many users have incorporated this printer into their daily printing routines due to its high-volume, cost-effective printing. There must be a group of users who want to use this printer but don’t know how to set it up on a device. In this write-up, I will teach you how to connect HP wireless printer to computer.
Before moving forward, you must know that HP printers are advanced and reliable. They are built with innovative technologies to provide a seamless printing experience during every printing task. So, let’s get started with the connection process of the HP Smart Tank 6001 wireless printer. This blog will explain 3 easy methods to connect this wireless printer to a computer.

How to Connect HP Printer to Wi-Fi?
The first step towards connecting your printer to a computer via a wireless connection is to connect the printer to Wi-Fi. Here are the three best connection methods you can use.
Method 1: With Wireless Setup Wizard
This is the first method to connect your printer to a computer system. In this method, you use the Wireless Setup Wizard from the printer’s Control Panel. However, this method is only applicable to printers with a touchscreen. So, check out the steps below to do that:
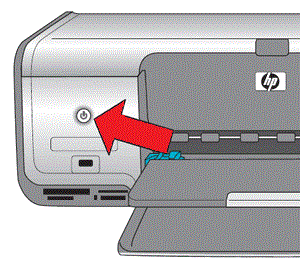
- In the first step, turn on your printer.
- Then, disconnect any cables from the printer.
- Now, move on to the Control Panel on your printer and press the Wireless button or Network menu.
- After that, choose the Wireless Settings option and select the Wireless Setup Wizard.
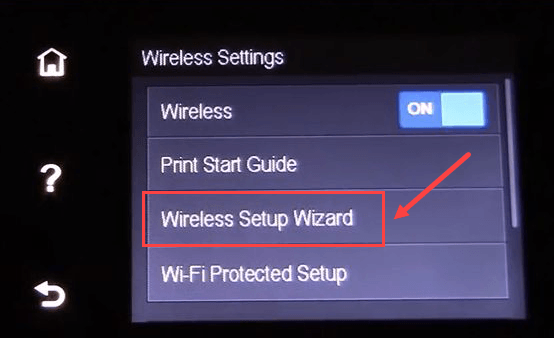
- Next, locate your network and hit the WPA key.
- Finally, press the OK button.
This is 'how to connect HP wireless printer to computer'. Now, let’s move on to the next method if your printer doesn’t have a display.
Method 2: Using the WPS Push Button
In this method, you need to use the WPS push button on your router. Let’s check out the steps below to understand how to do it:
- To begin, push the WPS push button on your printer.
- In case your printer doesn’t have a WPS push button, head to the Control Panel and select the WPS push button mode.
- Then, hit the wireless menu and choose the Wi-Fi Protected Setup option.
- Now, continue with the on-screen directions to finish the setup process.
- After that, choose the WPS Push Button option.
- Next, press that button on your wireless router.
- Finally, press and hold the WPS button on the router for two minutes.
That’s how you can use the WPS push button method to connect your printer to a wireless network.
Method 3: Through HP Auto Wireless Connect
As the name suggests, this is an automatic connection, and you don’t need the username and password of your connection to set up the connection. Let’s have a look at the steps:
- In the first step, visit the HP support page.
- Then, head to the software section.
- Now, supply your printer model in the search box and let the printer display on the screen.
- You may also need to choose your operating system during the connection process.
- Perform the steps displayed on your screen, power on your printer, and start the software.
- Thereafter, select a wireless option while selecting a network connection type.
- Finally, hit the “Yes, send my wireless settings to the printer” option.
This is how you can connect your HP wireless printer to Wi-Fi using an automatic connection. Now, let’s check how to get the printer drivers for your printer.
How to Connect HP Wireless Printer to Computer?
Here, you will see the steps to connect your printer to a Windows computer. Check out the steps below to do that:
- First of all, go to the Start menu on a Windows PC.
- Then, hit the Settings option.
- Now, choose the Devices option.
- Under the Devices option, choose the Printers & scanners option.
- Now, choose the Add a printer or scanner option.
- Allow your computer to detect the available printer devices.
- Once you see your printer in the list, select it.
- Finally, click the Add Device option to add the printer.
That’s how you can add your HP Smart Tank 6001 printer to your Windows computer and start printing.
Troubleshooting Wireless Printer Connection Issues
A wireless connection is one of the perfect connection methods for your HP Smart Tank 6001 printer. However, sometimes, this connection may not develop properly and cause issues. If you face this problem with your printer, check out the steps below to fix this error.
- You need to restart your printer and computer.
- Check if the computer and your printer are added to the same network.
- Check if your internet connection is strong enough.
- Disconnect both of your devices from the internet connection and power supply, and then reconnect them back.
After following these methods, your printer should work in optimal condition.

Frequently Asked Questions
Question
Why Is My HP Printer Is Not Connecting to My Computer?
If your printer is
not connecting to your computer, you can restart your devices and check your
wireless router for errors. Also, you can disconnect your devices from the
network and reconnect them back to the network. Once you do everything, check
your printer’s status to see if it is connecting to your computer now or not.
Question
How Do I Add My HP Printer to My Windows Computer?
If you want to add your printer to a Windows computer, check out the steps below:
- First of all, go to the Printers & Scanners option.
- Then, hit the Add
a printer or scanner option.
- Now, choose the Add
a printer option with the help of an IP address or hostname.
- After that, provide the IP address or hostname of
your printer.
- Lastly, continue with the on-screen steps.
Question
How Can I Add My HP Printer to My Mac?
To add a printer to your Mac, use these steps:
- First of all, go to the Apple menu.
- Then, choose the System Settings option.
- Now, hit the Printers
& Scanners option.
- Select the Add
printer, scanner, or fax option.
- Next, choose your printer from the given list.
- Lastly, hit the Add option to add your printer.
Enter your Comments Here: